Content Portal
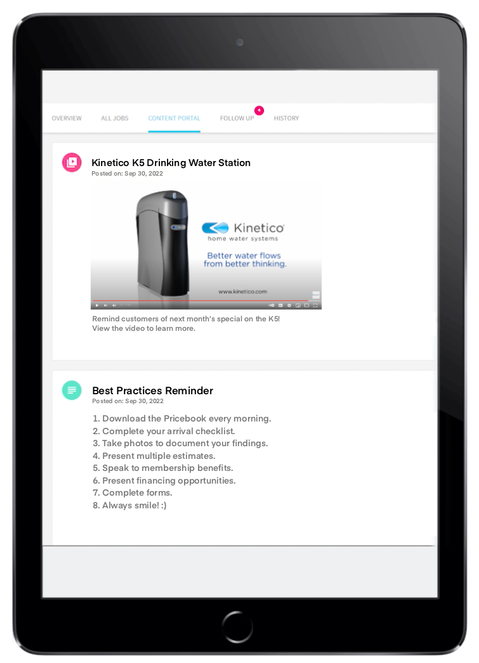
Through the Content Portal, you can create and publish specific content tailored to your technicians' needs to keep them informed on a variety of topics.
Some of these topics could include:
✓ Training
✓ Sales promotions
✓ Updated workflows
✓ Mobile best practices
✓ Installation instructions
✓ New product information
✓ Company announcements

Example Use Cases:
You've recorded a video of how to install a new model of equipment that just came in.
A video is provided through Content Portal to show your install team how to properly install the unit.
There's a new sales promotion starting next month.
You remind your technicians to communicate this promotion to customers as a potential upsell.
A new membership was just rolled out.
You emphasize the importance and benefits of the new membership through Content Portal.
Additionally, Content Portal allows you to select which technicians you want to share the post with and set how long you want it to be available. This allows you control over which technicians see which content and whether the content is to remain seen permanently or temporarily.

How to post in Content Portal
1. Go to the navigation bar and click Settings . In the side panel, click Operations > Content Portal.

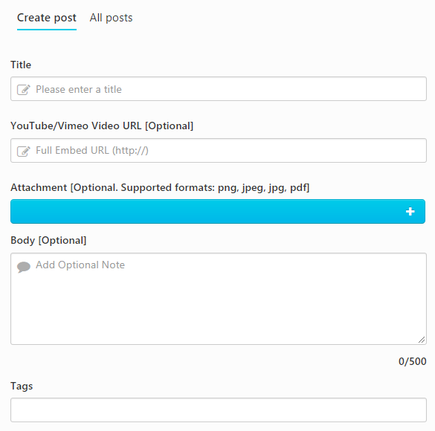
2. Click the Create post tab.
Tip: To edit or view upcoming and expired posts, click the All posts tab.
3. Enter a title for your post in the Title field. This title displays in the mobile app.
4. Add content to your post:
-
To add a video, enter a YouTube or Vimeo URL in the YouTube/Vimeo Video field.
-
To upload an image file or PDF, under Attachment, click + and select the file from your computer.
-
Enter any text you want to include with your post in the Body field.
5. Click the Tags dropdown and select any tags you want to attach to your post.
Note: You can filter your posts by tags in the All posts tab.
6. Under Start Time, enter the date and time you want your post to go live.
7. Under End Time, enter the date and time you want your expire. Or, to make your post available indefinitely, leave these fields blank.

8. Click Select Audience to choose who you want to share your post with. You can select technicians by business unit or individually.
9. When you're done, click Send. The content will go live in your technicians' Content Portal at the selected start time.

******
Still have questions about Content Portal?
Reach out to your Customer Success Manager for more guidance! 🙂
